Thursday, May 21, 2015
Apple Released Second Beta of iOS 8 to Developers

iOS 8 has come with several new features, including improved integration with OS X through Continuity, Family Sharing features, interactive notifications, a Health app, QuickType, and improvements to several apps like Messages, Safari, Siri, and Mail.
iOS 8 beta 2 also contains several tweaks, such as Podcasts app is now preinstalled, while in current builds, users who want to use the app have to download it from the App Store, Safari is able to block ads that redirect to the App Store, and a new introduction screen for Private Browsing in Safari. You can take a look at all changes in the new beta of iOS 8.
iOS 8 is available to developer in nowadays, the public release is expected to be in the fall, likely alongside the announcement of the new iPhone version.
Here are the direct download links (you need to a member of iOS Developer program to access them)
iPad
- iPad Air (Model A1474)
- iPad Air (Model A1475)
- iPad Air (Model A1476)
- iPad mini (Model A1489)
- iPad mini (Model A1490)
- iPad mini (Model A1491)
- iPad (4th generation Model A1458)
- iPad (4th generation Model A1459)
- iPad (4th generation Model A1460)
- iPad mini (Model A1432)
- iPad mini (Model A1454)
- iPad mini (Model A1455)
- iPad Wi-Fi (3rd generation)
- iPad Wi-Fi + Cellular (model for ATT)
- iPad Wi-Fi + Cellular (model for Verizon)
- iPad 2 Wi-Fi (Rev A)
- iPad 2 Wi-Fi
- iPad 2 Wi-Fi + 3G (GSM)
- iPad 2 Wi-Fi + 3G (CDMA)
iPhone:
- iPhone 5s (Model A1453, A1533)
- iPhone 5s (Model A1457, A1518, A1528, A1530)
- iPhone 5c (Model A1456, A1532)
- iPhone 5c (Model A1507, A1516, A1526, A1529)
- iPhone 5 (Model A1428)
- iPhone 5 (Model A1429)
- iPhone 4s
iPod touch:
- iPod touch (5th generation)
- iOS 8 Features
- Take a Look of Some Hidden Features in iOS 8 (Video)

Friday, May 15, 2015
Attention Pokémasters Your iPhone just became a real life Pokédex thanks to Wolfram Alpha and Siri

The massive information engine Wolfram Alpha just added a whopping 649 Pokémon to its database. For fans of the games, that fact is pretty cool all on its own, but if you happen to own an iPhone or an iPad with Siri, its even more awesome. You see, thanks to Siris ability to search Wolfram Alpha for information, your iDevice is now as close to a real-life Pokédex as youll probably ever have.
In the Pokémon television shows, movies and games, the lead character always carries around the iconic, all-knowing Pokédex which responds to voice and searches for information on any pokémon that appears. Your iDevice now works the same way:
- Activate Siri
- Ask "Search Wolfram for [insert pokémon name here]"
- Watch as Siri provides you with a ton of information, including its history, physical characteristics, stats and even full-color images
Friday, March 13, 2015
ZenUI How to Setting up your Profile
 |
| ZenUI-Zenfone, How to Setting up your Profile |
Make your Zenfone device truly your own and set up your profile info.
- Launch the Contacts app then tap Set up my profile or ME. NOTE: ME appears when you’ve set up your Google account on your Zenfone device.
- Fill in your info such as mobile or home number. To add other info, tap Add another field.
- When you’ve completed your info, tap Done. To view your profile info, swipe down from the top
Saturday, March 7, 2015
Ghostark gadget to hunt ghosts
You have always felt the soul of a ghost hunter? There is now a gadget all-in-one to exercise your passion. Named GhostArk it will be available this summer for $ 200.
“Who you gonna call? Ghostbusters! “Or maybe you if you upgrade to GhostArk, a gadget for nothing less than to hunt ghosts. »Designed for ghost hunters, paranormal investigators or amateurs”, this device offers to record the sounds and noises using high-sensitivity microphones to measure electromagnetic fields and temperature variations, or listen to radio frequencies. Everything can be recorded in real time to not miss a paranormal experience (provided separately, of course). Reports and files can then be retrieved by connecting the USB while on a computer, like a digital recorder or smartphone.
The GhostArk is probably a very serious product developed by an Italian group of experts in the paranormal, based in Venice, “a city rich in supernatural phenomena.” If Massimo Rossi, the big boss GhostArk, highlights the qualities of his unit, it seems still not enough to track minds-until on his blog, Rossi said to be looking for donations Paranormal equip its association in Italy “advanced equipment” including HD cameras or Spirit Box – there are indeed numerous counter products for ghost hunters!
Paranormal enthusiasts eager to seek the truth elsewhere will still be able to get into the hunt for ghosts from this summer with this gadget all-in-one whose selling price is set at $ 199, about 180 euros. It remains to find a haunted house to try it.
Ghostark - gadget to hunt ghosts
Thursday, March 5, 2015
iOS 8 users to get early access to apps through Apple’s TestFlight

The new initiative, explained on Apples Developer portal, allows devs to send up to 1,000 copes of new their wares to beta testers, via email invitations sent through iTunes Connect.
Once iPhone and iPad users on iOS 8 have received an invitation they’ll be asked to download the free TestFlight app from the app store, where they’ll be able to install the betas.
TestFlight, an existing beta testing tool which Apple snapped up last year, will inform the iOS user whenever a new version is available and will offer developer instructions on new focus points. The idea is for beta testers to offer feedback, suggestions for new improvements and pick out bugs.
Developers must still submit the app for beta review and it must comply with the full App Store review guidelines before testers can get in on the act.
TestFlight enables Apple’s developers to have the same experience they in turn offer to developers with their Mac OS X and iOS beta programs.
The result should enable developers to have easier access to their potential user base, which should lead to more complete apps hitting the App Store when the time is right.
And, best of all, interested parties have the opportunity to get their paws on new and unreleased apps first.
Thursday, February 12, 2015
How to disable Zenfone CPU rendering
Credit to: AriaSatya Mahatma
This would increase performance and battery because the CPU is being freed up to perform other tasks. This tutorial will not interfere with the OTA update.
Requirements
1. Rooted Device2. Root Explorer (Example : Es File Explorer)
Step-by-step
1. Go to /system/lib/egl3. Edit egl.cfg
4. Delete "0 0 android"
5. Save & Exit
6. Delete libGLES_android.so
7. Reboot your Device
Screenshot
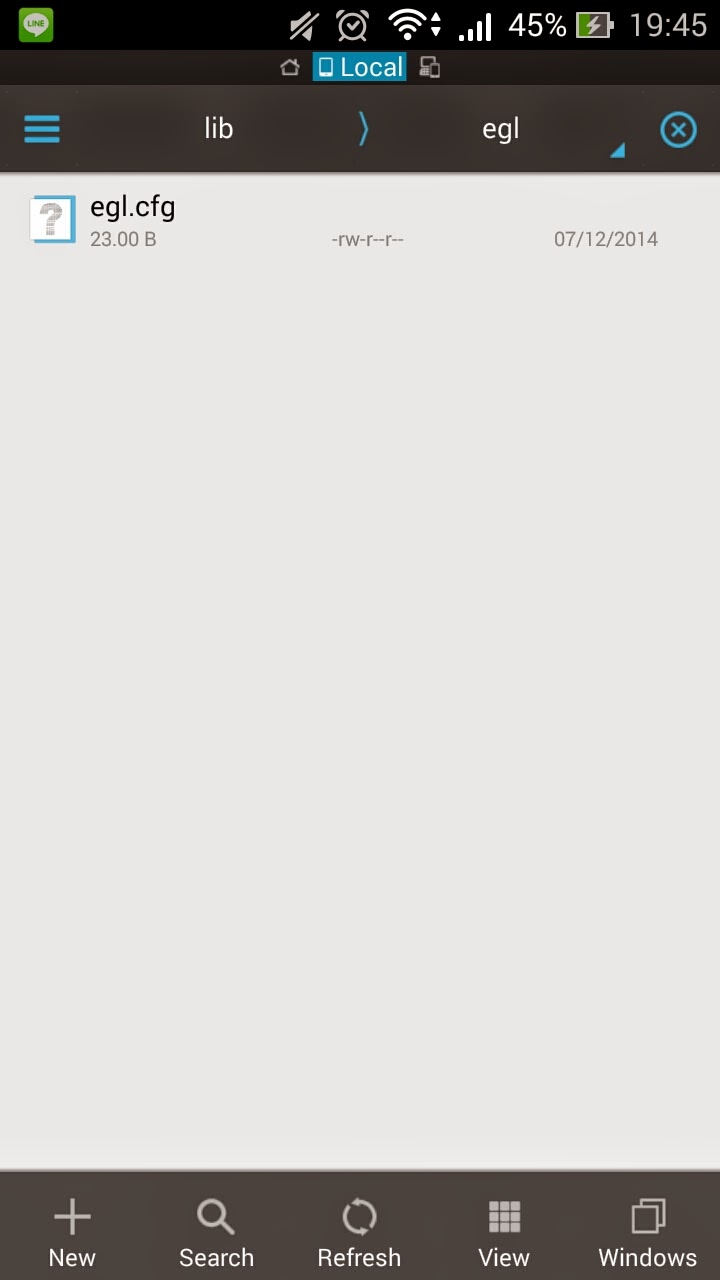 |
| 1 |
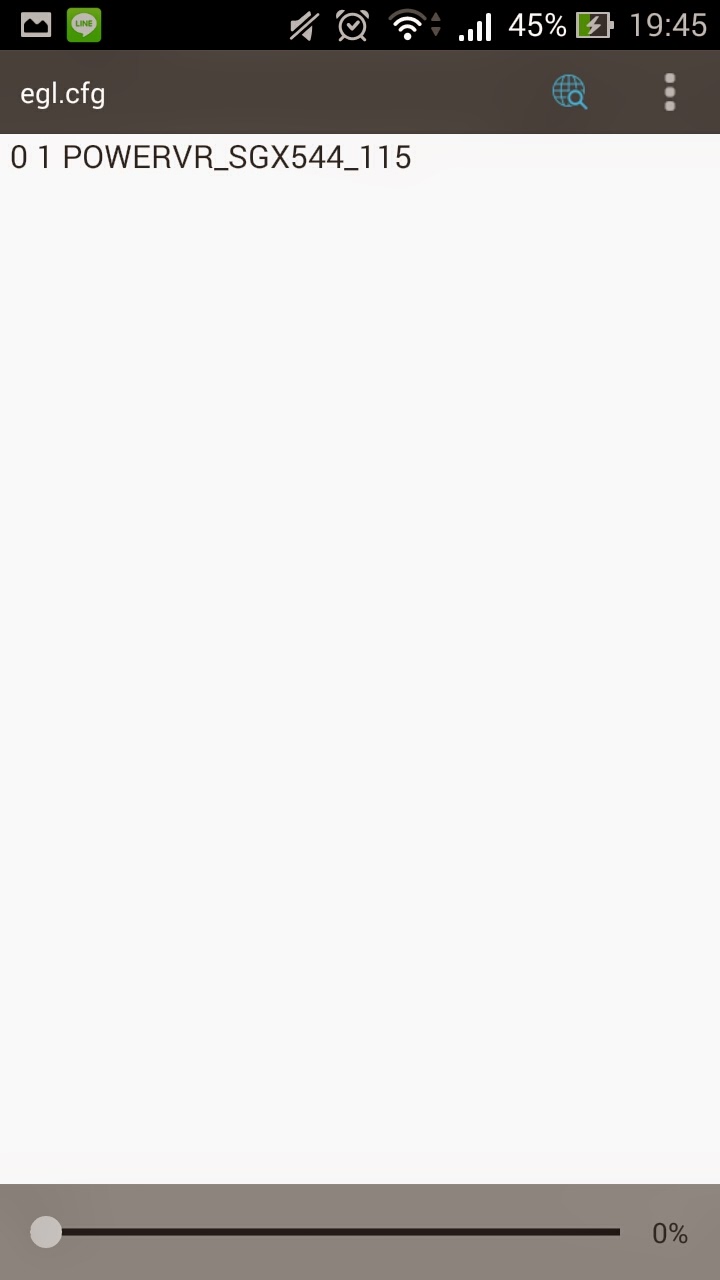 |
| 2 |
Wednesday, February 11, 2015
How to add remove or change buttons of function in Quick settings on phone
How to add, remove or change buttons of function in Quick settings on phone?
1. Tap "Quick settings options" icon in Quick settings.

2. The "tools" are the functions of green buttons in Quick settings. Please select 4 tools here.
The "items" are the functions of blue buttons in Quick settings. Please select at least 8 items here.
Tap "Save".

Wednesday, January 28, 2015
Samsung Galaxy Core 2 as modem to connect to internet from PC

How to use Samsung Galaxy Core 2 as Modem
Samsung Galaxy Core 2 USB tethering
Samsung Galaxy Core 2 can be used as USB modem through the USB tethering feature. To use Galaxy Core 2 as modem, follow the below mentioned steps.- Enable the mobile data which you can accesss through the quick menu. You can access this menu from swiping the screen from top to bottom
- Connect your phone to PC using the USB cable.
- Normally Windows detects the phone installs the required drivers. If it does not recognises the device then download and install the Samsung Galaxy Core 2 PC suite.
- Now Go to Settings which once again available in the quick menu or in the application page also you can choose.
- Under settings, Go to More->Tethering & Mobile Hotspot.
- Enable the USB tethering
Samsung Galaxy Core 2 as WiFi Hotspot
- Navigate to Settings->More...->Tethering & mobile hotspot. Now enable Mobile WiFi hotspot by tapping on to it. You can customise the SSID and password by going to Setup WiFi hotspot page.
Sunday, January 25, 2015
How to Create A PIN Lock for Samsung Galaxy Gio GT S5660
Locking phone screen to prevent other people from easily accessing the phone seems to be a must-to-do thing to protect the private data. And among all available methods, a relatively effective method is creating a PIN lock. Moreover, this post primarily introduces the steps to create a PIN lock on Samsung Galaxy Gio GT-S5660.
Related Articles:
Samsung Official Samsung Display Samsung Mobile Display S LCD to Merge

The incorporation of Samsung Display Co., Samsung Mobile Display Co, and S-LCD Inc., is expected to close on July 1, Robert Yi, head of Samsung Electronics investor relations said. Council approved the merger of electronics companies in the previous meeting on Friday.
Samsung Electronics will become the controlling owner of the merged entity, but several other Samsung affiliates, including Samsung SDI Inc. (006400.SE), will also hold a significant stake.
The merged company will make the liquid crystal display, or LCD, screens for mobile phones, computers and TV as well as organic light-emitting diode, or OLED display, for phone and TV, especially in factories in South Korea and China.
Samsung Decided to merge its three display units: Samsung Display, Samsung Mobile Display (SMD) and S-LCD. The merger is expected to close on July 1st. Samsung Electronics will control the new unit, the the which will also be held by other Samsung units (Such as Samsung SDI). This is not a surprise.
A 7-inch Super AMOLED prototype

"Currently, the display market is undergoing rapid changes with OLED panels expected to fast replace LCD panels to Become the mainstream. Amid this structural change of the display industry, adopting measures for change and innovation, Including business restructuring, are essential to our competitiveness Improv Display for our business "
How to Set Password on HUAWEI C8813
To set a password on HUAWEI C8813 phone, you can adopt either of the following two methods.
Related Articles:
How to Set Password on HUAWEI U8800/U8800+
How to Set Password on HUAWEI Ascend P6/P7
How to Set Password on HUAWEI Honor 3C
How to Set Password on HUAWEI Honor 3X
How to Turn on USB Debugging in Huawei Honor 3X
Saturday, January 24, 2015
How to Set Password on Samsung ATIV S GT I8750
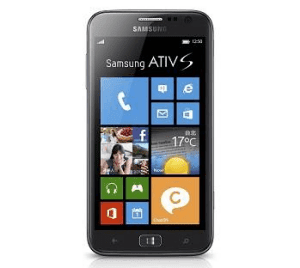
With Windows Phone 8 system, 4.8-inch screen and many other advantageous configurations, Samsung ATIV S GT-I8750 phone has enjoyed great popularity among customers. However, a number of users have no idea how to set a password to it. Therefore, the steps to set a password on Samsung GT-I8750 are introduced below.
Related Articles:
How to Set Password on Samsung Trend II I739
How to Set Password on Samsung S5380/S5380I
How to Open USB Debugging in Samsung Galaxy S5
Android USB Driver for Samsung
How to Set Password on ZTE V5
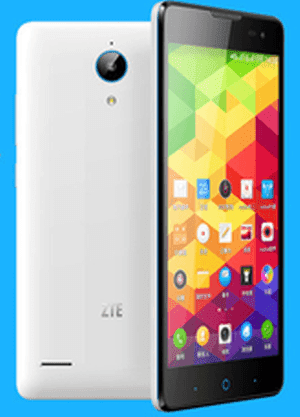
A password is compared to a security lock, which can effectively help you prevent other people from directly using your phone without your allowance. Thus, it is indispensable and sensible for you to learn how to set a password on your ZTE V5 phone, following the steps below.
Step 6: Re-enter the password and click OK when finished.
Related Articles:
- How to Enable USB Debugging in ZTE Grand S II LTE
- Android USB Drivers for ZTE
- Recover All Deleted Text Messages on ZTE Blade V-series Android
- How to Set Password on ZTE Nubia X6
- How to Set Password on ZTE V880
How to Set Password on ZTE Nubia X6

Setting a password to your ZTE Nubia X6 phone is a wise option since it will protect the significant phone data for you. As for how to realize it, you can refer to the following procedures.
Related Articles:
- Android USB Drivers for ZTE
- How to Enable USB Debugging in ZTE Grand S II LTE
- How to Set Password on ZTE Nubia Z5/Nubia Z5 Mini
- How to Set Password on ZTE Nubia Z5S/Nubia Z5S Mini
- Recover All Deleted Text Messages on ZTE Blade V-series Android
Friday, January 23, 2015
How to Set Password on HUAWEI Honor 3X
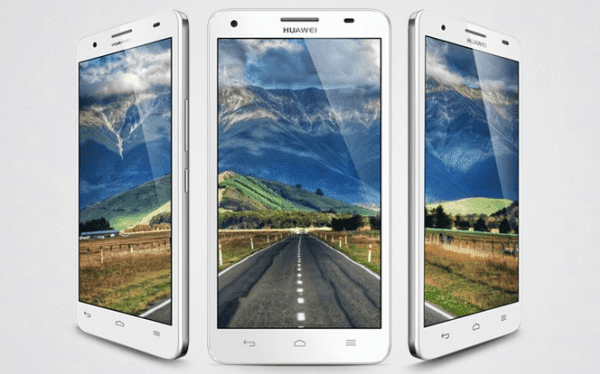
Cannot find the Password setting in your HUAWEI Honor 3X phone? In fact, you can locate it in “Screen lock” settings. If you still have no idea where it is, you can refer to the following guide which not only tells you how to find it, but also teaches you how to set a password.
Related Articles:
How to Turn on USB Debugging in Huawei Honor 3X
How to Set Password on HUAWEI Ascend P6/P7
How to Set Password on HUAWEI U8800/U8800+
Huawei Android USB Drivers
Tuesday, January 20, 2015
How to Set Pattern Lock on Samsung Galaxy Gio GT S5660
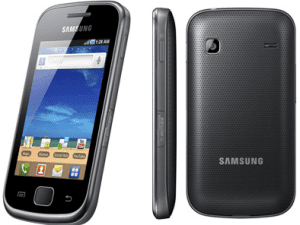
Almost every day, you can see people around you draw diversified patterns on the phone screens to unlock their phones. If you haven’t set a pattern lock on your Samsung Galaxy Gio GT-S5660 phone, your curiosity for the method to set it by yourself will definitely be aroused. Hence, this post illustrates the detailed steps for your reference.
Related Articles:
How To Use Sony Xperia M2 as Modem to Connect to Internet From PC
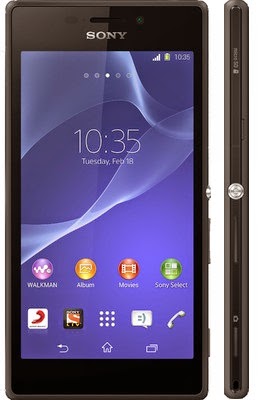
How to use Sony Xperia M2 as Modem
There are three ways, you can share the internet data from your Xperia M2 to other devices. 1. WiFi hotspot 2.USB tethering 3. Bluetooth Tethering. In this post we will learn USB tethering and WiFi hotspot.How to use Sony Xperia M2 as WiFi Hotspot
- Go to Settings from the app tray.
- Then go to More… > Tethering & portable hotspot.
It is good configure WiFi hotspot settings before you enable Xperia M2 WiFi Hotspot.
- Tap Portable Wi-Fi hotspot settings > Configure Wi-Fi hotspot.
- Enter the Network SSID information.
- To select a security type, tap the Security field. If required, enter a password.
- Tap Save.
- Tap back button and select Portable Wi-Fi hotspot checkbox.
- When prompted, tap OK to confirm. WiFi icon appears in the status bar once the portable Wi-Fi hotspot is active.
- To stop sharing your data connection via Wi-Fi® , unmark the Portable Wi-Fi hotspot checkbox.
How to customise Xperia M2 WiFi hotspot Settings
- Tap Settings > More… > Tethering & portable hotspot.
- Tap Portable Wi-Fi hotspot settings > Configure Wi-Fi hotspot.
- Enter the Network SSID for the network.
- To select a security type, tap the Security field.
- Enter a password you like.
- Tap Save.
How to Enable Sony Xperia M2 USB tethering
- Using the USB cable connect Xperia M2 to a computer.
- Tap Settings > More… > Tethering & portable hotspot.
- Select USB tethering checkbox, then tap OK when prompted. USB tethering icon is displayed in the status bar once you are connected.
- To stop sharing your data connection, unmark the USB tethering checkbox or disconnect the USB cable.
How to Set Password on HTC One M7
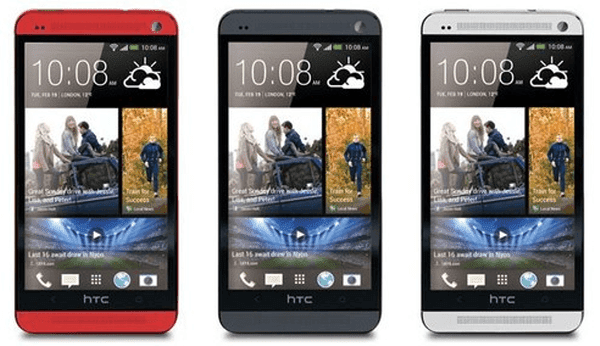
If you feel embarrassed to orally warn other people not to use your HTC One M7 phone, you can set a password to it so as to euphemistically imply your idea. And the following steps can help you quickly set a password on your phone.
- How to Set Password on HTC One M8
- Android USB Drivers for HTC
- Restore Deleted SMS on HTC One Mini Android Phone
Sunday, January 18, 2015
Asus Transformer Pad Infinity Download Updated To v10 4 4 18

Asus Transformer Pad Infinity Download Updated To v10.4.4.18, The Jelly Bean update rollout process for the Asus Transformer Pad Infinity has begun in last month. Asus has got a great reputation reputation for its timely updates. We’ve one more news today for the owners of the Transformer Pad Infinity tablets. A new minor update is being pushed out now for the devices, the brings the software version up to JRO03C.US_epad-10.4.4.18. Android OS version still remains at v4.1.1 on the tablet.
This is a minor update and the build brings a set of bug fixes. Here’s the full changelog the new firmware update, provided by Asus:
Camera (All SKUs)
Fix the issue that switching to front camera in Facebook app would cause Facebook app to crash.
Wi-Fi (All SKUs)
Fix the issue that some 802.1x Wi-Fi APs cannot be connected after upgrading to Jelly Bean.
ASUS Software Keyboard (All SKUs)
Fix the issue that “Y” and “Z” characters are opposite in ASUS Czech (QWERTY) keyboard.
Fix the issue that Backspace key on dock does not work in Browser input field to delete words randomly.
Widgets (CN SKU only)
Fix the issue that user selects Google Search Widget in “Widgets” page would cause ‘this widget not responding.’
Browser (All SKUs except CN SKU)
Added Google Bookmark sync function to Android Default Browser.
Encryption (All SKUs)
Fix issues that, with the TF700T encrypted in ICS and Wi-Fi on, user cannot enter system after upgrading to Jelly Bean.
With TF700T encrypted in Jelly Bean and restart pad with Wi-Fi on, user cannot enter system.
Download

Those with Transformer Pad Infinity TF700Ts should be able to grab the update now by heading into Settings > System Firmware Update > Check Update. Users, who own the unlocked pad Infinities with the ASUS bootloader unlock tool, won’t be notified to install this update. They’ve to wait till Asus provided the full ROM on its website.
How to Set Password on Sony Xperia Z L36h

With the following guide, you can rapidly set a password to your Sony Xperia Z L36h phone.
Step 6: Re-type the password and click OK.
Related Article:
- Android USB Drivers for Sony